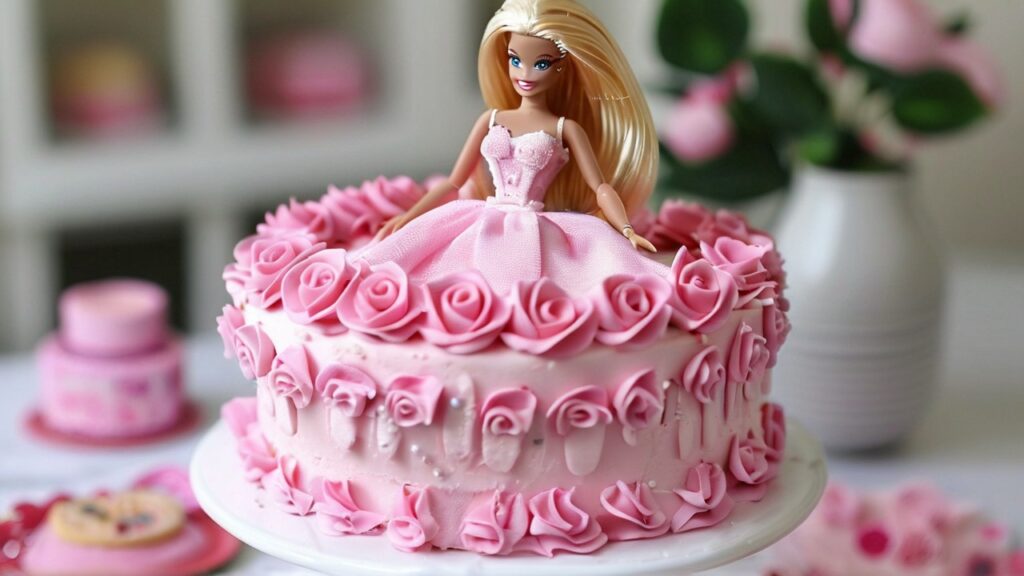
![Barbie Cake [With Step-by-Step perfect experience]](https://cook.qrgeneratorfree.com/wp-content/uploads/2024/10/image141-1024x576.jpg)
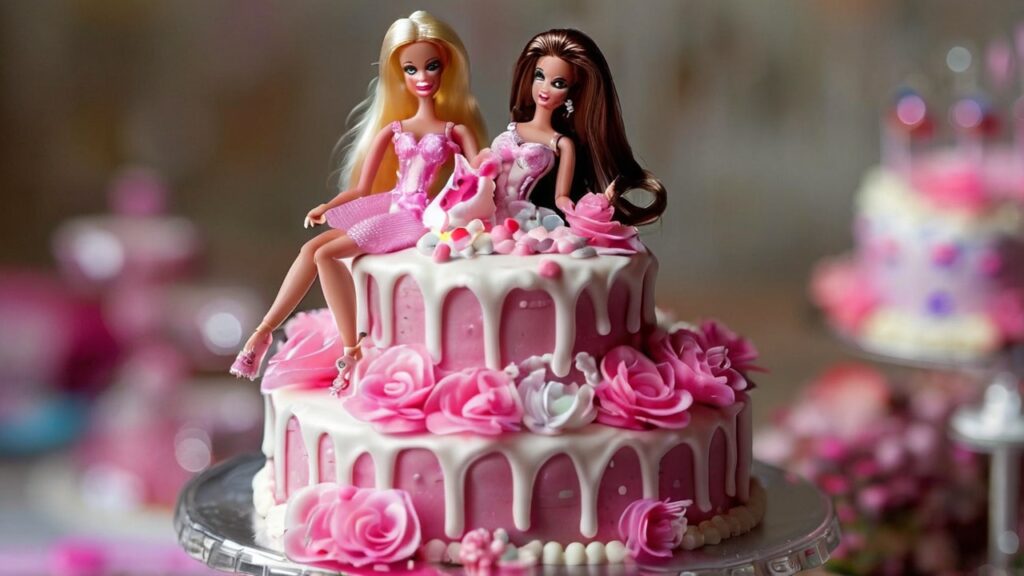
Barbie Cake
Are you planning to make a Barbie cake for a special occasion? Whether it’s for a birthday party or any celebration, a Barbie cake is sure to impress! In this detailed guide, we’ll show you how to make a beautiful and delicious Barbie cake with easy-to-follow instructions. Perfect for beginners or seasoned bakers, this cake will make you the star of the event! Let’s dive into the step-by-step process to create your dream Barbie cake.
Table of Barbie Cake Contents
Barbie Cake :Ingredients
For the Cake:
- 2 ½ cups all-purpose flour
- 2 ½ teaspoons baking powder
- ½ teaspoon salt
- 1 cup unsalted butter (room temperature)
- 1 ½ cups granulated sugar
- 4 large eggs (room temperature)
- 1 tablespoon vanilla extract
- 1 cup whole milk
For the Buttercream Frosting:
- 2 cups unsalted butter (room temperature)
- 6 cups powdered sugar
- 2 teaspoons vanilla extract
- 4-5 tablespoons heavy cream (adjust for desired consistency)
- Pink food coloring (optional for Barbie theme)
For Decoration:
- 1 Barbie doll (wrapped in plastic wrap from the waist down)
- Various sprinkles, edible glitter, and fondant for details
Barbie Cake : Instructions
Step 1: Preheat the Oven and Prep Cake Pans
Begin by preheating your oven to 350°F (180°C). Prepare three 6-inch round cake pans by greasing them and lining the bottoms with parchment paper to ensure your cake layers release easily.
Step 2: Mix the Dry Ingredients
In a medium-sized bowl, sift together the all-purpose flour, baking powder, and salt. Set this dry mixture aside.
Step 3: Cream the Butter and Sugar
Using a stand mixer or hand mixer, cream together the room-temperature butter and granulated sugar on medium speed until light and fluffy. This should take about 3-4 minutes. Scrape down the sides of the bowl occasionally to ensure even mixing.
Step 4: Add the Eggs and Vanilla
Once the butter and sugar are creamed, add the eggs one at a time, beating well after each addition. Add the vanilla extract and mix to combine.
Step 5: Alternate Adding Dry Ingredients and Milk
With the mixer on low speed, alternate adding the dry ingredients and milk, starting and ending with the dry mixture. Mix until just combined. Do not overmix, as this can result in a dense cake.
Step 6: Bake the Cake Layers
Evenly divide the cake batter between the prepared cake pans. Smooth the tops with a spatula and tap the pans on the counter to release any air bubbles. Bake for 25-30 minutes, or until a toothpick inserted into the center comes out clean.
Step 7: Cool and Level the Cakes
Allow the cakes to cool in their pans for 10 minutes before transferring them to a cooling rack. Once fully cooled, use a serrated knife to level the tops of each cake layer. This will ensure a stable and even base for stacking.
Step 8: Make the Buttercream Frosting
While the cakes cool, make the buttercream frosting. In a large mixing bowl, beat the room-temperature butter until creamy. Gradually add the powdered sugar, one cup at a time, mixing well between each addition. Add the vanilla extract and heavy cream, beating on high speed until the frosting is light and fluffy. Add food coloring to achieve the desired pink hue.
Step 9: Stack and Frost the Cake
To assemble the Barbie cake, place the first cake layer on a cake board or large plate. Spread an even layer of frosting on top. Repeat this process with the remaining cake layers. Once stacked, apply a thin “crumb coat” layer of frosting to seal in the crumbs. Refrigerate the cake for 20-30 minutes to set the crumb coat.
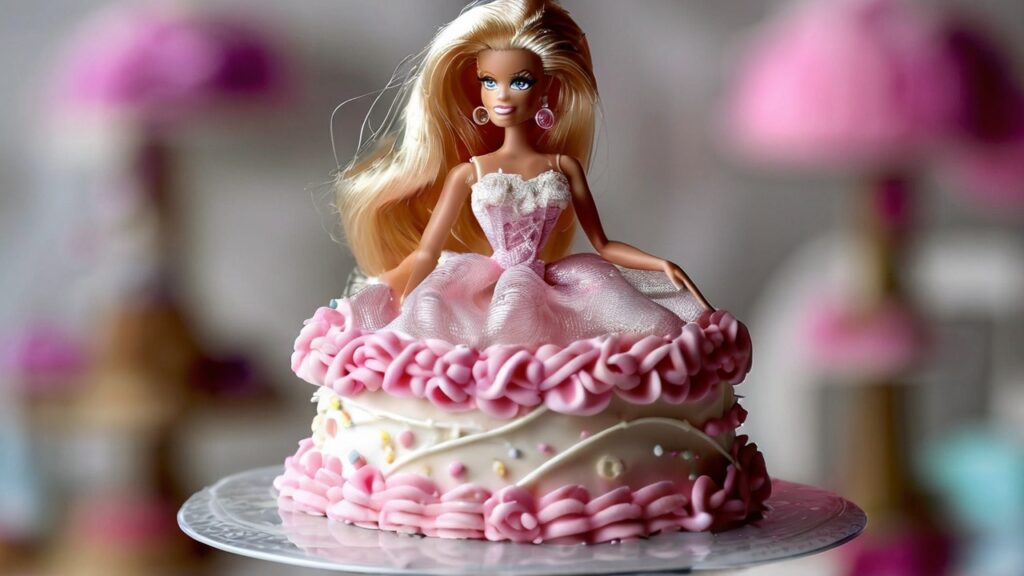
After the crumb coat has set, apply a thicker final layer of buttercream, smoothing it out with an offset spatula. Use piping bags with different tips to create ruffles, flowers, or any desired designs for Barbie’s skirt.
Step 10: Insert the Barbie Doll
Wrap the lower half of the Barbie doll in plastic wrap to prevent direct contact with the cake. Gently insert the doll into the center of the cake, ensuring it is secure. Adjust the frosting and add extra decorations around the doll to resemble her dress.
Step 11: Add Decorative Finishes
For the final touch, add edible glitter, fondant details, and sprinkles. You can also pipe additional buttercream ruffles or flowers around the doll for a more intricate look.
FAQs About Barbie Cakes:
1. Can I use a different cake flavor for my Barbie cake?
Yes! You can customize the cake flavor to your liking. Vanilla, chocolate, and strawberry are popular options, but feel free to experiment with other flavors such as lemon or red velvet.
2. How do I make my Barbie cake gluten-free?
To make this recipe gluten-free, you can substitute the all-purpose flour with a gluten-free flour blend. Be sure to use a blend designed for baking to achieve the best texture.
3. Can I make the cake ahead of time?
Yes, you can bake the cake layers up to 2 days in advance. Store them wrapped tightly in plastic wrap at room temperature or in the refrigerator. Frost and assemble the cake on the day you plan to serve it.
4. How long does the Barbie cake last?
A Barbie cake will stay fresh for up to 3 days when stored in an airtight container at room temperature. If you live in a warm climate, refrigerating the cake may help preserve the frosting.
5. What can I use if I don’t have a Barbie doll?
If you don’t have a Barbie doll, you can use any similar-sized doll or figurine. Just make sure to wrap the lower part of the figure in plastic wrap before inserting it into the cake.
Notes: Barbie Cake
- Ensure that the Barbie doll or any figurine used is food-safe, especially if it will be placed directly into the cake.
- For a smoother finish, chill the cake in the fridge after applying the crumb coat. This helps the final frosting layer go on more smoothly.
- Experiment with different piping techniques to make Barbie’s dress look as elaborate or simple as you desire.
Nutritional Information (Per Serving): Barbie Cake
- Calories: 350 kcal
- Fat: 18g
- Carbohydrates: 45g
- Protein: 3g
- Sugar: 35g
- Fiber: 0.5g
- Cholesterol: 80mg
- Sodium: 150mg
Conclusion: For Barbie Cake
Making a Barbie cake is not only fun but also a beautiful way to celebrate special moments. With the step-by-step instructions provided, this guide is perfect for both novice and experienced bakers. Customize your Barbie cake with different colors, decorations, and flavors to make it uniquely yours. Your guests will be amazed by this show-stopping cake!
Don’t hesitate to share your creations and make lasting memories with this stunning Barbie cake!
Barbie Cake [With Step-by-Step Instructions]
Equipment
- 3 (6-inch) round cake pans
- Parchment paper
- Stand mixer or hand mixer
- Spatula
- Serrated knife for leveling cakes
- Offset spatula for frosting
- Cake board or large plate
- Piping bags with assorted tips (optional)
- Cooling rack
- Toothpicks for detailing fondant
Ingredients
- For the Cake:
- 2 ½ cups all-purpose flour
- 2 ½ teaspoons baking powder
- ½ teaspoon salt
- 1 cup unsalted butter room temperature
- 1 ½ cups granulated sugar
- 4 large eggs room temperature
- 1 tablespoon vanilla extract
- 1 cup whole milk
- For the Buttercream Frosting:
- 2 cups unsalted butter room temperature
- 6 cups powdered sugar
- 2 teaspoons vanilla extract
- 4-5 tablespoons heavy cream adjust for desired consistency
- Pink food coloring optional for Barbie theme
- For Decoration:
- 1 Barbie doll wrapped in plastic wrap from the waist down
- Various sprinkles edible glitter, and fondant for details
Instructions
- Step 1: Preheat the Oven and Prep Cake Pans
- Begin by preheating your oven to 350°F (180°C). Prepare three 6-inch round cake pans by greasing them and lining the bottoms with parchment paper to ensure your cake layers release easily.
- Step 2: Mix the Dry Ingredients
- In a medium-sized bowl, sift together the all-purpose flour, baking powder, and salt. Set this dry mixture aside.
- Step 3: Cream the Butter and Sugar
- Using a stand mixer or hand mixer, cream together the room-temperature butter and granulated sugar on medium speed until light and fluffy. This should take about 3-4 minutes. Scrape down the sides of the bowl occasionally to ensure even mixing.
- Step 4: Add the Eggs and Vanilla
- Once the butter and sugar are creamed, add the eggs one at a time, beating well after each addition. Add the vanilla extract and mix to combine.
- Step 5: Alternate Adding Dry Ingredients and Milk
- With the mixer on low speed, alternate adding the dry ingredients and milk, starting and ending with the dry mixture. Mix until just combined. Do not overmix, as this can result in a dense cake.
- Step 6: Bake the Cake Layers
- Evenly divide the cake batter between the prepared cake pans. Smooth the tops with a spatula and tap the pans on the counter to release any air bubbles. Bake for 25-30 minutes, or until a toothpick inserted into the center comes out clean.
- Step 7: Cool and Level the Cakes
- Allow the cakes to cool in their pans for 10 minutes before transferring them to a cooling rack. Once fully cooled, use a serrated knife to level the tops of each cake layer. This will ensure a stable and even base for stacking.
- Step 8: Make the Buttercream Frosting
- While the cakes cool, make the buttercream frosting. In a large mixing bowl, beat the room-temperature butter until creamy. Gradually add the powdered sugar, one cup at a time, mixing well between each addition. Add the vanilla extract and heavy cream, beating on high speed until the frosting is light and fluffy. Add food coloring to achieve the desired pink hue.
- Step 9: Stack and Frost the Cake
- To assemble the Barbie cake, place the first cake layer on a cake board or large plate. Spread an even layer of frosting on top. Repeat this process with the remaining cake layers. Once stacked, apply a thin “crumb coat” layer of frosting to seal in the crumbs. Refrigerate the cake for 20-30 minutes to set the crumb coat.
- After the crumb coat has set, apply a thicker final layer of buttercream, smoothing it out with an offset spatula. Use piping bags with different tips to create ruffles, flowers, or any desired designs for Barbie’s skirt.
- Step 10: Insert the Barbie Doll
- Wrap the lower half of the Barbie doll in plastic wrap to prevent direct contact with the cake. Gently insert the doll into the center of the cake, ensuring it is secure. Adjust the frosting and add extra decorations around the doll to resemble her dress.
- Step 11: Add Decorative Finishes
- For the final touch, add edible glitter, fondant details, and sprinkles. You can also pipe additional buttercream ruffles or flowers around the doll for a more intricate look.
Notes
For a smoother finish, chill the cake in the fridge after applying the crumb coat. This helps the final frosting layer go on more smoothly.